

Fixing Recessed Sockets: Spacers for Deep Back Boxes
Have you just finished a stunning kitchen or bathroom renovation, only to find your new sockets and switches look clumsy and unprofessional? It is a common problem. After adding beautiful new tiles, a sleek glass splashback, or stylish wall panelling, your electrical back boxes are now sitting too deep in the wall. This leaves your socket faceplates looking sunken, wobbly, and with an ugly gap that is a magnet for dust and grime. It ruins the high quality finish you have worked so hard to achieve.
Fortunately, there is a simple, safe, and effective solution. A socket spacer for a deep back box is designed specifically to solve this problem. This guide will walk you through everything you need to know, from understanding why sockets become recessed to choosing the perfect spacer and installing it safely. We will help you achieve that perfectly flush, professional finish your home deserves.
Why Your Electrical Sockets Sink into Deep Back Boxes
A recessed socket is a common sight in modern homes, especially after renovations. The issue occurs when the front edge of the electrical back box, the metal or plastic box housing the wiring within your wall, ends up too far behind the finished wall surface. This creates a void that a standard socket faceplate cannot bridge on its own.
- The Core Problem: A recessed socket happens when the back box is set too far back from the final wall surface, such as plasterboard, tiles, or wood panelling.
- Common Causes: The most frequent culprits are home improvements. Adding a layer of tiles and adhesive, fitting decorative panelling, or even just a thick skim of new plaster can increase the wall's thickness, leaving the original back box sunken.
- Smart Home Complications: Many modern smart switches and sockets require deeper back boxes (35mm or even 45mm) to accommodate their bulky electronics. If these are installed before the final wall finish is decided, they can easily end up recessed.
- More Than Just Looks: A sunken socket is not just an aesthetic issue. It can be a safety concern. A wobbly faceplate puts strain on the electrical connections behind it, and the gap can expose wiring to dust and moisture, creating potential hazards.

The Impact of Kitchen and Bathroom Renovations
Kitchens and bathrooms are the most common areas where you will encounter recessed sockets. The addition of tiles is almost always the cause. A standard wall tile might be 8mm thick, and when you add 2mm to 4mm of tile adhesive, you have instantly created a gap of over 10mm. This seemingly small distance is more than enough to cause problems.
- The Gap Dilemma: Adding just 10mm of tile and adhesive means your socket faceplate now sits 10mm away from the back box it needs to screw into.
- The Screw Problem: The standard M3.5 electrical screws supplied with faceplates are often not long enough to reach the threaded lugs on a deep set back box. This leads to a frustrating search for longer screws, which may not solve the underlying stability issue.
- The Wobble Factor: Even if you find longer screws, tightening the faceplate just pulls it into the empty space, causing it to bend or wobble. The faceplate is designed to be supported by the wall surface, and without a spacer to fill that gap, it will never feel solid and secure.
Smart Home Upgrades and Depth Requirements
The rise of smart home technology has introduced new challenges for electrical installations. Smart switches, with their WiFi modules, relays, and internal processors, are much bulkier than their traditional counterparts. To accommodate this, electricians often install deeper back boxes, typically 35mm or 45mm deep, to provide adequate space for wiring and heat dissipation.
- Deeper by Design: Modern smart switches from brands like Lightwave, Lutron, or Broadlink often need deep back boxes to function correctly and safely.
- The Unintended Consequence: When these deep boxes are paired with a standard wall finish like plasterboard, they can leave the faceplate sunken even without additional tiling. The extra depth is great for components but bad for a flush finish.
- Why a Spacer is Essential: A socket spacer becomes critical in these situations. It fills the gap, allowing the bulky internal components of the smart switch to sit comfortably within the deep box while ensuring the faceplate finishes perfectly flush with the wall.
Choosing the Right Spacer Depth for Your Project
Once you have identified the problem, the next step is to find the right solution. Choosing the correct spacer depth is crucial for a secure and professional looking installation. A spacer that is too thin will not solve the wobble, and one that is too thick will prevent the faceplate from sitting flush against the wall.
- Measure the Recess: The most important step is to accurately measure the "recess depth". This is the distance from the front face of the wall (e.g., the surface of your tiles) to the front edge of the electrical back box.
- Standard Sizes: In the UK market, standard moulded plastic spacers are typically available in fixed sizes, most commonly 5mm, 10mm or 20mm. These are fine if your gap happens to be one of those exact measurements.
- Match the Gang Count: Ensure the spacer you choose matches the size of your socket. A single socket needs a single gang spacer, and a double socket needs a double gang spacer.
- Surface Box vs. Plate Extension: Be careful not to confuse a spacer with a surface mounted box. A spacer is a simple frame that sits behind the faceplate, whereas a surface box is a complete enclosure used when you cannot sink a back box into the wall at all.
How to Measure Your Recess Accurately
Getting an accurate measurement is the key to a one-time fix. "Eye-balling" the depth is a recipe for frustration and multiple trips to the hardware shop. A few moments with a simple tool will give you the exact dimension you need.
- Use a Ruler or Depth Gauge: The easiest method is to place a straight edge (like a ruler) flat across the socket opening on the wall. Then, use another ruler or a tape measure to measure the distance from the underside of the straight edge down to the screw lug on the back box.
- Allow for Compression: For a perfectly tight fit, it is often best to order a spacer that is the exact measured depth or even half a millimetre thicker. This allows the faceplate to slightly compress the spacer when tightened, creating a firm, seamless seal against the wall.
- The Easy Way with Our Tool: To eliminate guesswork, we developed a purpose built tool. The Build My Spacer tool guides you through the process, helping you configure the exact size, depth, and colour you need for a flawless result. It is the modern way to solve this classic DIY headache.
Single Gang vs Double Gang Considerations
Most sockets in UK homes are either single gang (one socket) or double gang (two sockets). It is vital that your spacer matches this configuration to ensure the screw holes align correctly.
- Correct Alignment: A UK back box has its screw holes in standard positions. Your spacer must have corresponding holes so the long M3.5 screws can pass through the faceplate, through the spacer, and into the back box lugs.
- Challenges with Multi-Gang Plates: Older British homes or custom installations can sometimes feature non standard faceplates with three, four, or even more gangs. Finding off the shelf spacers for these is nearly impossible.
- The Bespoke Solution: For these complex setups, a custom solution is required. We offer a custom multi-gang faceplate spacer service, where we can design and print a spacer to fit any configuration you have.
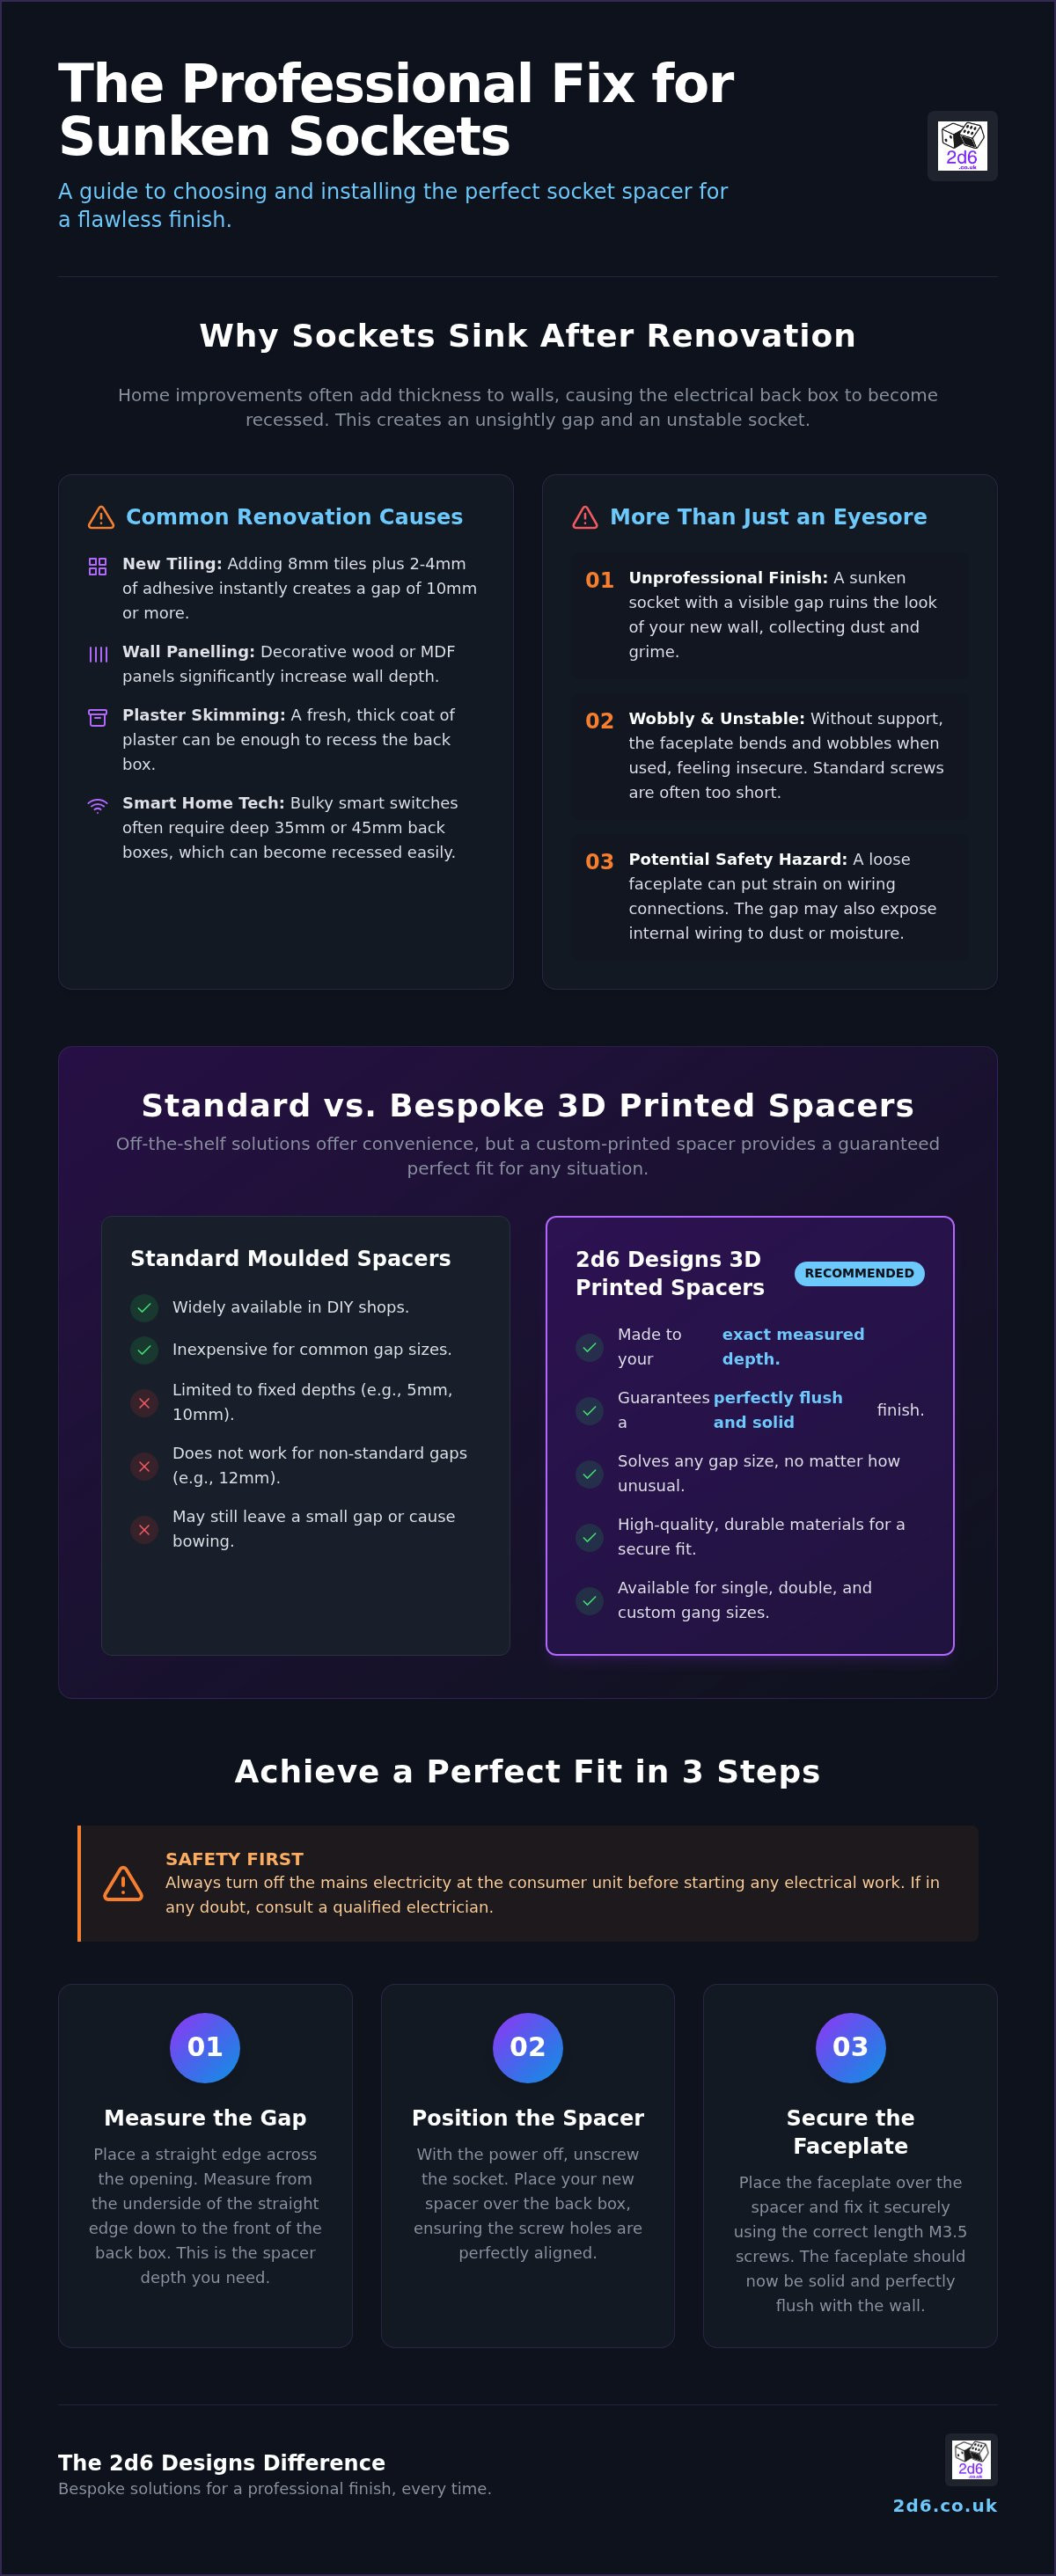
Comparing Standard Moulded Spacers with Custom 3D Printed Solutions
When you need a socket spacer for a deep back box, you have two main choices: a generic, mass-produced moulded spacer from a large DIY store, or a custom 3D-printed spacer tailored to your exact needs. While moulded spacers can be a quick fix, they often fall short of providing a truly professional finish.
- Off-the-Shelf Limitations: Moulded spacers are cheap and widely available but are limited to a few fixed sizes and basic colours (usually just white).
- The Power of Precision: 3D-printed spacers offer a bespoke fit for any depth. Whether your gap is 7mm, 14.5mm, or 21mm, a spacer can be printed to that exact measurement, ensuring a perfect fit every time.
- Aesthetic Freedom: With 3D printing, you can choose a colour that perfectly matches your wall, your decor, or the faceplate itself, creating a seamless and almost invisible finish.
- Superior Materials for Safety: Unlike generic plastic spacers, our 3D-printed solutions are made from a special flame retardant version of ABS. This material is chosen for its durability, heat resistance, and superior safety profile, giving you complete peace of mind behind a live electrical fitting.
The Limitations of Mass-Produced Spacers
The one size fits all approach of mass-produced spacers is often their biggest weakness. In the world of home renovation, gaps are rarely a standard, round number.
- The "Near Enough" Problem: If your gap is 14mm, a standard 10mm spacer is useless. It will not fill the void, and your socket will still wobble. A 20mm spacer is too big and will not fit.
- The Stacking Issue: Some people try to solve this by stacking multiple thin spacers. This is a bad idea. Stacking creates instability, looks messy, and can make it even harder to align the screws correctly. It is an unprofessional workaround that compromises the integrity of the fitting.
- Wiring Space Interference: Poorly designed generic spacers can sometimes have thick frames that reduce the internal space available for wiring, making it difficult to fit the socket back into the box without pinching a cable.
Why Bespoke 3D Printing is the Modern DIYer’s Favourite Tool
For discerning homeowners and DIY enthusiasts who value a meticulous finish, bespoke 3D printing is the ultimate problem solver. It bridges the gap between a frustrating bodge job and a perfect, professional result.
- Precision to the Millimetre: The ability to print a spacer to the exact depth of your new tiles is a game changer. It guarantees a flush, solid fit that looks and feels like it was part of the original design.
- A High-End Finish: In a newly renovated kitchen with expensive worktops and high end appliances, a sunken, wobbly socket stands out for all the wrong reasons. A colour matched, perfectly fitting spacer helps maintain that premium feel.
- Tailored to Your Home: Explore our full collection of socket spacers to see the range of tailored options available, from different depths and colours to solutions for unique fittings.
How to Safely Install a Socket Spacer in a Deep Back Box
Installing a socket spacer is a straightforward job for a competent DIYer, but because you are working with electricity, safety must always be your number one priority. If you are ever in doubt, do not hesitate to call a qualified electrician.
- Safety First! Before you do anything else, go to your consumer unit (fuse box) and isolate the circuit you will be working on. Switch off the correct breaker and, if possible, lock it off or place a note on it to prevent anyone from turning it back on.
- Check Your Screws: You will almost certainly need longer M3.5 electrical screws. The new length required will be the length of your original screws plus the depth of your new spacer.
- Handle Wires with Care: When fitting the spacer, ensure you feed the wires through the central opening without pinching, stretching, or damaging the insulation.
- Perfect Alignment: The goal is to sandwich the spacer perfectly between the wall surface and the back of the socket faceplate, with the screw holes on all three components aligned.
Step-by-Step Installation Guide
With the power safely isolated, follow these simple steps for a secure installation.
- Unscrew the Faceplate: Carefully unscrew the two screws holding the socket faceplate to the wall. Gently pull the faceplate forward, bringing the wiring with it. Do not pull too hard or strain the connections.
- Position the Spacer: Take your new spacer and slide it over the body of the socket, feeding the wires through the middle. Position it so it sits flat against the finished wall surface, ensuring the screw holes line up with the holes in the back box.
- Re-secure the Faceplate: Push the socket faceplate back towards the wall, so it now sits snugly against the spacer. Insert your new, longer M3.5 screws and tighten them evenly. Do not overtighten, just tighten until the plate is firm and level against the wall with no movement.
Safety Checks and Final Testing
Once the faceplate is secure, it is time for a final check before restoring power.
- Inspect Your Work: Look around the edges of the faceplate. Ensure no bare wires are visible or trapped between the spacer and the wall or the spacer and the plate.
- Restore Power and Test: Go back to the consumer unit and switch the circuit back on. To confirm everything is working correctly and safely, use a plug-in socket tester. This inexpensive device will verify the socket is wired correctly and earthed.
- When to Call a Professional: If at any point the wiring looks old, damaged, or confusing, or if your socket tester shows a fault, turn the power back off immediately and call a qualified electrician to inspect your work.
Bespoke Socket Spacers: The 2d6 Designs Difference
At 2d6 Designs, we believe that a job worth doing is worth doing well. Our spacers are designed for homeowners, renovators, and DIY enthusiasts who value a meticulous finish and appreciate the difference that precision makes. We are not a faceless corporation; we are a small UK business dedicated to solving real world home improvement problems.
- A Meticulous Finish: We create solutions for those who notice the small details and want every part of their home to look perfect.
- UK Studio Production: All our products are designed and produced in our St Neots based studio, using high quality, durable materials.
- Versatile Solutions: We can create spacers for almost any fitting, including light switches, single sockets, double outlets, and even more complex multi gang arrangements.
- Support a Small British Business: By choosing our products, you are supporting a small creative business that understands the quirks and challenges of UK housing.
Crafted with Precision in the UK
Every product we send out is a reflection of our passion for design and quality. We combine modern 3D printing technology with a hands on, artisanal approach to ensure every item meets our high standards.
- Every item is made with love and many cups of tea to ensure the highest quality.
- Our hand-finished approach means we check every spacer for smooth edges and a perfect fit, so you do not have to worry about installation issues.
- Learn more about our journey and our passion for creating unique solutions on our About Us page.
Custom Orders for Unique Electrical Needs
We know that not every home follows the standard rulebook. If you are facing a particularly tricky installation or have a non standard fitting, we are here to help.
- If a standard size or shape will not solve your problem, our bespoke 3D printing service is the answer.
- We love working directly with homeowners to solve those specific renovation "disasters" that big box stores have no solution for.
- It is this dedication to solving real problems with precision-engineered parts that makes our spacers the preferred choice for achieving professional looking DIY results.
Frequently Asked Questions
- What is a socket spacer and when do I need one?
- A socket spacer is a frame that fits between your wall and your socket faceplate. You need one when your electrical back box is recessed too deep into the wall, typically after tiling or plastering, to fill the gap and allow the faceplate to be fitted securely and flush.
- Can I stack multiple socket spacers for a very deep recess?
- We strongly advise against stacking multiple thin spacers. It creates an unstable fitting that is difficult to align and looks unprofessional. It is much safer and more effective to use a single, solid spacer that is custom made to the exact depth you need.
- Are 3D printed socket spacers safe for electrical use in the UK?
- Yes, when made with the correct materials. Our spacers are printed from a special flame retardant grade of ABS plastic, chosen for its excellent heat resistance and durability. This ensures they are a safe and reliable choice for use behind electrical fittings.
- Do I need longer screws when using a spacer for a deep back box?
- Yes, almost certainly. You will need M3.5 electrical screws that are long enough to pass through your faceplate, the spacer, and securely into the back box. The required length is the depth of your spacer plus the length of your original screws.
- How do I measure the thickness of the spacer I need?
- Place a straight edge across the opening in the wall and measure the distance from the back of the straight edge to the front of the back box lug where the screw goes. For ultimate ease and precision, use our online configuration tool to build the perfect spacer for your project.
- Can I use a spacer for a light switch as well as a socket?
- Absolutely. The principle is exactly the same, as light switches use the same single gang back boxes as sockets. We offer spacers for both light switches and sockets.
- What colour options are available for bespoke socket spacers?
- We offer a wide range of colours to match popular faceplate finishes and decor styles, including white, black, grey, and more. This allows you to achieve a discreet, seamless look that blends in perfectly with your room.
- Is it legal to install a socket spacer myself in the UK?
- In the UK, a homeowner is generally permitted to carry out minor electrical work, such as replacing a socket faceplate, as long as it is not in a "special location" like a bathroom. However, you must be competent to do the work safely. If you have any doubts about your ability, you must hire a qualified electrician.