
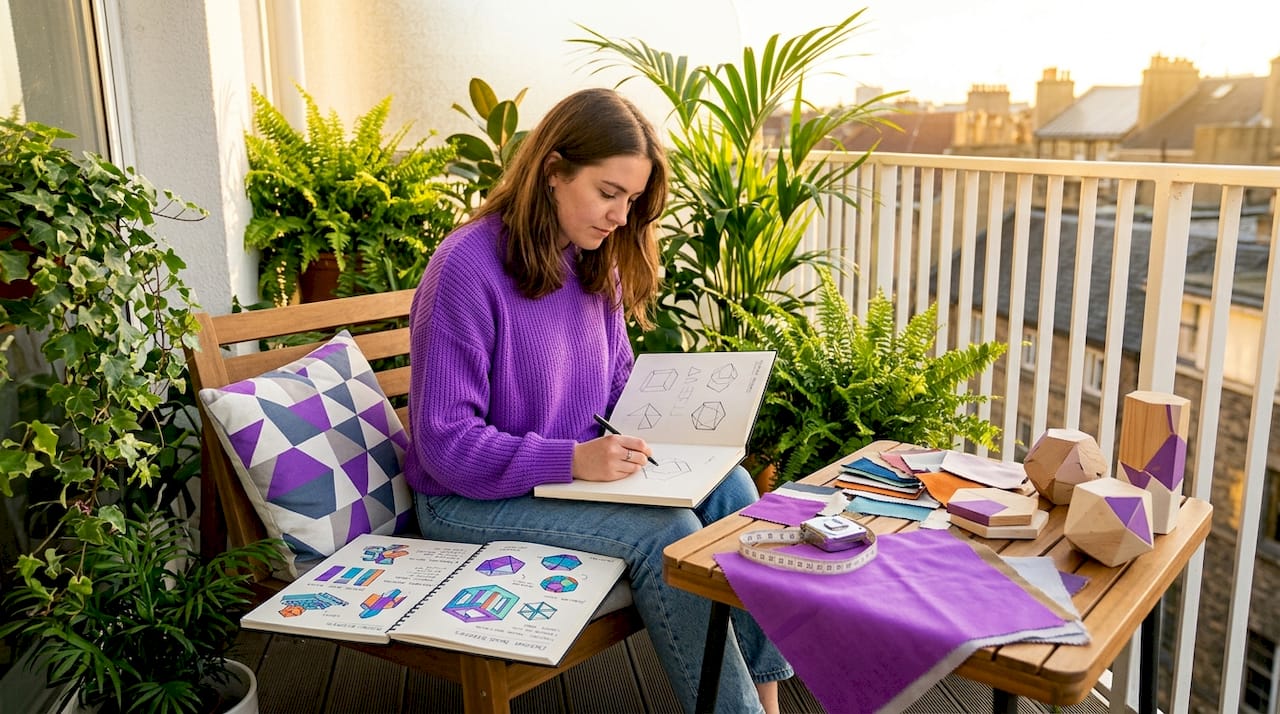
How to commission bespoke 3D printed decor
Generic decor fills shelves in every high street shop. If you want something that actually fits your space, reflects your personality, or makes a gift feel genuinely considered, you need to commission bespoke 3D printed decor. The process is more straightforward than most people expect, but there are real pitfalls around file formats, scale, material choice, and provider communication that can derail even a well-planned order. This guide covers everything you need to know before you place that commission.
Table of Contents
- Key takeaways
- What you need before commissioning bespoke 3D printed decor
- Preparing and submitting your 3D model files
- Working with print services and artisans
- Inspecting the finished piece
- My honest take on commissioning bespoke prints
- Bespoke 3D printed decor from 2d6
- FAQ
Key takeaways
| Point | Details |
|---|---|
| File format matters | Use STL for standard prints and OBJ for multi-colour work, always bundling texture files with OBJ. |
| Scale verification is critical | Export in millimetres and confirm dimensions in slicer software to avoid size mismatches. |
| Material choice affects longevity | PLA suits most indoor decor; resin offers finer detail but requires careful handling and disposal. |
| Clear communication prevents errors | Share precise specs, usage context, and reference images with your provider before printing begins. |
| Quality checks protect your investment | Inspect dimensional accuracy, surface finish, and structural integrity before accepting a commission. |
What you need before commissioning bespoke 3D printed decor
Before you contact a provider, you need a clear picture of what you want and the files or references to back it up. Skipping this stage is the most common reason commissions go wrong.
Design concept and style
Start with a clear brief. Decide whether you want something geometric and minimal, organic and sculptural, or character-based. If it is for a specific room, note the colour palette, existing furniture style, and the exact surface or shelf where the piece will sit. For gifts, think about the recipient’s interests, the occasion, and whether the item needs to be functional (a nameplate, a coaster, a wall sign) or purely decorative.
File formats
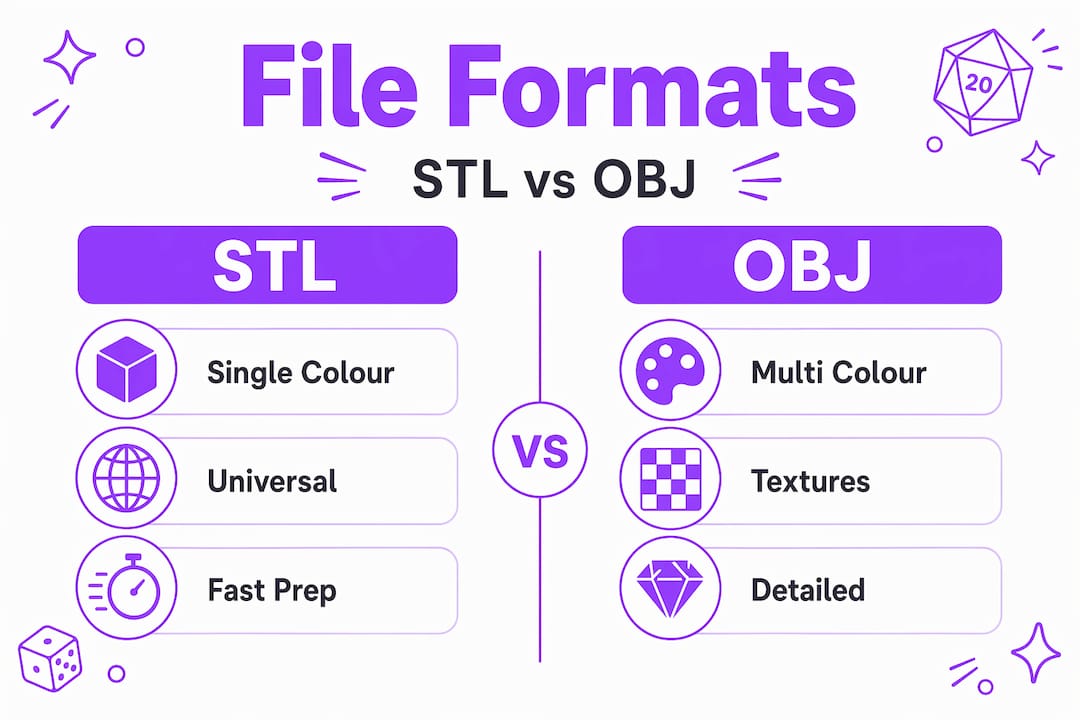
The file format you supply dictates what the printer can do with your design. STL strips away colour and lighting data, keeping only raw surface geometry. It is the standard for resin and FDM printing. OBJ retains spatial and colour data, making it the preferred choice for multi-colour printing workflows. The format you need is determined by the printer technology and the project, not personal preference.
| Format | Best for | Colour support | Notes |
|---|---|---|---|
| STL | FDM and resin prints | No | Universal, lightweight |
| OBJ | Multi-colour prints | Yes | Requires .mtl and texture files |
| 3MF | Advanced services | Yes | Increasingly supported |
Dimensions and scale
STL files lack unit definitions, so a value of “25” could mean 25 millimetres or 25 inches depending on the software. Always export in millimetres and state your intended physical dimensions clearly in your brief. If you need a wall sign to fit a specific alcove or a sculpture to sit on a particular shelf, include those measurements explicitly.
Material options
- PLA: Widely available, easy to print, good colour range. Suitable for most indoor decorative items.
- PETG: More durable and slightly flexible. Good for functional decor pieces.
- Resin: Produces finer surface detail. Ideal for intricate sculptures and small decorative objects.
- ABS: Tougher and heat-resistant, but less common for decorative commissions.
Uncured resin poses health risks and requires protective equipment during handling. Cured resin is non-recyclable general waste. If you are commissioning a resin piece, ask your provider about their disposal protocols and whether the finished item requires any post-cure handling on your part.
Pro Tip: Ask your provider whether multi-colour PLA prints are preferable to painted finishes. Multi-colour printed PLA resists chipping far better than paint, making it a more durable choice for display pieces.
Preparing and submitting your 3D model files
Getting the file right before submission saves time, money, and frustration. Here is a practical sequence to follow.
- Open your file in slicer software. Tools such as PrusaSlicer, Cura, or Bambu Studio let you inspect the model visually before sending it anywhere.
- Check for mesh errors. A watertight mesh with no holes or non-manifold edges is required for a clean print. Repair tools such as Netfabb and Meshmixer can fix most common issues automatically.
- Verify scale. Set the slicer units to millimetres and confirm the model dimensions match your intended physical size. This single step prevents the most common commission failure.
- Orient the model. For most commissions, let the provider handle orientation unless a specific surface finish or feature angle is critical to your design.
- Export correctly. Use STL for standard single-colour prints. For multi-colour work, export as OBJ and bundle the accompanying .mtl and texture files. Missing material files will cause colour data to be lost entirely.
- Write a clear specification document. Include intended dimensions in millimetres, material preference, colour references (RAL or Pantone codes if relevant), and how the piece will be displayed or used.
Pro Tip: If you do not have a 3D model file and are commissioning a design from scratch, provide reference images from multiple angles. A front view alone leaves too much to interpretation, especially for organic or character-based designs.
The comparison below shows what a well-prepared submission looks like versus a common incomplete one.
| Submission element | Complete submission | Incomplete submission |
|---|---|---|
| File format | STL or OBJ with all companion files | OBJ without .mtl or texture files |
| Dimensions | Stated in millimetres with confirmed slicer check | No unit specification |
| Colour reference | RAL or Pantone code provided | “Make it blue” |
| Display context | Photo of intended location included | Not mentioned |
| Revision terms | Agreed in writing before work starts | Assumed |
Working with print services and artisans
Finding a reputable provider is straightforward once you know what to look for. The quality of your commission depends as much on the working relationship as on the files you supply.
Finding the right provider
Look for providers who show finished examples of bespoke or personalised 3D decor, not just generic prints. Customer reviews on specific items carry more weight than general ratings. UK-based providers offer faster turnaround and easier communication for revisions, which matters more than most people realise when you are working to a deadline.
Questions worth asking before you commit:
- What printer technology do you use (FDM, resin, multi-colour)?
- Which materials do you stock, and do you have samples?
- What finishing options are available (sanding, painting, coating)?
- What is the standard turnaround time, and do you offer expedited dispatch?
- How do you handle revisions if the first print does not match the brief?
Managing the commission process
Share your specification document alongside the model file. Do not assume the provider will infer details from the file alone. If the piece is a gift with a fixed delivery date, say so upfront. Most providers will flag potential issues early if they have the full context.
Ask for a proof or test print for complex commissions before the full production run. For simpler items, a digital render showing scale and orientation is usually sufficient. Agree on revision terms in writing before work begins, not after you receive something that needs changing.
Pro Tip: Budget for at least one revision. Even with a precise brief, the first physical print sometimes reveals a proportion or finish issue that was invisible in the digital file. Providers who include one revision in their pricing are worth paying a small premium for.
Cost varies significantly by material, complexity, and print time. Resin prints cost more than FDM for equivalent sizes. Multi-colour prints carry a premium over single-colour. A realistic budget for a medium-sized bespoke decorative piece in the UK starts at around £25 to £50 for simpler FDM items, rising considerably for detailed resin work or large-format pieces.
Inspecting the finished piece
When your commission arrives, do not just glance at it and put it on the shelf. A structured inspection takes five minutes and protects you if something needs to be raised with the provider.
What to check:
- Dimensional accuracy: Measure the piece against your stated specifications. For decor intended to fit a specific space, this is non-negotiable.
- Surface finish: Look for layer lines, stringing, blobs, or under-extrusion. Minor layer lines are normal on FDM prints. Significant surface defects are not.
- Colour fidelity: For multi-colour prints, compare against your reference. Colour shift between the digital preview and the physical print is common but should be within an acceptable range.
- Structural integrity: Check for cracks, delamination, or weak points, particularly at thin sections or overhangs.
Scale confusion is the leading reason bespoke 3D printed decor commissions fail, despite seemingly correct previews. Always confirm physical dimensions before raising any other quality concern with your provider.
Handling issues professionally
If something is wrong, photograph it clearly before contacting the provider. Reference your original specification document and state the specific discrepancy. Most reputable providers will reprint or refund without dispute when the issue is clearly documented.
Care by material:
- PLA: Keep away from direct sunlight and heat sources above 60°C. Clean with a dry or lightly damp cloth.
- Resin: Avoid prolonged UV exposure, which can cause yellowing. Dust with a soft brush.
- PETG: More heat-tolerant than PLA. Wipe clean with mild soapy water.
Pro Tip: A light coat of matt varnish on FDM printed decor reduces visible layer lines and adds a degree of UV protection. Apply after delivery if the provider has not already finished the surface.
My honest take on commissioning bespoke prints
I have seen more commissions go sideways over scale than any other single issue. Someone sends a file, the preview looks right, and then a wall sign arrives that is half the expected size because the units were never confirmed. It is a genuinely avoidable problem, but it keeps happening because people trust the visual preview over the numbers.
The other thing I have learned is that clear communication with your provider is worth more than the most technically perfect file. I have worked with providers who could compensate for minor file issues but could not compensate for a vague brief. If you tell someone you want “something modern for a living room,” you will get their interpretation of that, not yours. The more specific you are, the better the result.
Material choice is where I see people underestimate the long-term picture. PLA looks great on day one but can warp or fade if placed near a window or a heat source. For pieces that are meant to last years rather than months, resin or PETG is worth the extra cost. And for gifts, multi-colour PLA is genuinely the better option over painted finishes. It simply holds up better over time.
Commissioning bespoke 3D printed decor is one of the more satisfying ways to personalise a space or give a gift that actually means something. You just need to go in with the right preparation.
— Luke
Bespoke 3D printed decor from 2d6
If you want to see what well-executed personalised 3D decor looks like before placing a commission, 2d6’s full range is a good starting point. The catalogue includes made-to-order pieces across home decor, desk accessories, and geeky gifts, all produced in the UK with rapid dispatch.

For something with a strong visual personality, the custom wall sign shows how bespoke decorative prints can work in both home and office settings. If you are after a personalised gift, the couple line art sculpture is one of the most reviewed items on the site, and it demonstrates exactly the kind of detail that sets commissioned 3D decor apart from anything you would find in a shop.
FAQ
What file format should I use for a bespoke 3D print?
Use STL for standard single-colour prints and OBJ for multi-colour work. If you submit OBJ files, always include the companion .mtl and texture files, as missing these will cause colour data to be lost.
How do I avoid size errors when commissioning 3D printed decor?
Export your file in millimetres and state your intended physical dimensions clearly in your brief. Confirm the scale in slicer software before submitting, as STL files carry no unit information and a size mismatch is the most common reason commissions fail.
Is resin or PLA better for decorative 3D printed items?
PLA is suitable for most indoor display pieces and is more affordable. Resin produces finer surface detail and is better for intricate designs, but requires more careful handling during production and greater attention to UV exposure once displayed.
How do I raise a quality issue with a print provider?
Photograph the issue clearly, reference your original specification document, and state the specific discrepancy in writing. Most reputable providers will reprint or offer a refund when the problem is clearly documented against an agreed brief.
Can I commission bespoke 3D printed decor without a model file?
Yes. Many providers will create a model from reference images and a written brief. Supply photos from multiple angles and include precise dimensions to give the designer enough to work from accurately.
Recommended
- Custom Dystopian Office Wall Sign - Retro Minimalist 3D Printed Decor – 2d6 Designs
- Custom Twitch-Style Nameplate – 3D Printed Desk Sign for Streamers – 2d6 Designs
- Portal-Inspired Fridge Magnet Set – 3D Printed Geeky Gamer Gift – 2d6 Designs
- 2d6 Designs – Unique 3D-Printed Gifts & Decor